
 – Trailer")

 – Trailer")
 – Trailer")
")
 – Trailer")
 – Trailer")
 – Trailer")
 – Trailer")


")
")


")


Budget HDMI to USB Video Capture Device ( live streaming )
Input port: 1 x HDMI
HDMI input format:
480p, 576p, 720p50, 720p60, 1080p 24/25/30/50/60
( 2160p 24/25/30/50/60 Our Device goes to these but device versions may differ )
Output port: 1 x USB 3.0
Output format:
640x480 / 720x480 / 720x576 / 768x576 / 800x600 / 1024x768 / 1280x720 / 1280x800 / 1280x960 / 1280x1024 / 1368x768 / 1440x900 / 1600x1200 / 1680x1050 / 1920x1080/ 1920x1200 / 640x360 / 856x480 / 960x540 / 1024x576
Frame rate: 25 / 29.97 / 30/50 / 59.94 / 60fps
Audio and video capture: standard USB Video Compliant ( UVC ) and USB Audio Compliant ( UAC )
Power: <= 2.5W
The game capture card is suitable for devices with HDMI output, such as devices for PS4, for Xbox one and 360, for Wii U and for Switch.
The USB2.0 port makes it easier for you to have real-time streaming for Twitch, for Youtube, for OBS, for Potplayer and for VLC.
Suitable for low-latency game ( Not suitable for live view real-time game playing using PC/Laptop Display as there is a little latency ), can meet the needs of meetings.
It is a fast and economical way to share content in conference and online meetings. Just connect to a laptop via HDMI to start sharing.
The USB capture connects to your video source and computer, and captures high-definition video up to 1080p 30fps by default ( 1080p @60fps solution in this review ).
You do not need to install a driver, so you can use the built-in functions of the current software to get a seamless experience.
Compatible with most third-party software, it can be plug-and-play for Windows, for MacOS X, and for Linux.
Video Format is only: MJPEG
By default the max capture is 1080p @ 30fps by the device.
A 1080p 60fps workaround is in this review. Technically it is a stretched 720p @ 60fps using OBS to output @ 1080p @60fps
Nothing on the market to come close so we can compare.
Unknown Generic device
W 35mm x L 65mm x D 14mm + usb cable @ 220mm including usb minus the silver male end that plugs into usb port.
There are many different versions and distributors.
Our purchase prices ranged from £5.99 to £12.09
Supports up to 4K @60Hz input ( The device we received ) We have seen others that only support 1080p input at it's highest.
1080 @ 30fps is max capture or stream ( we have a solution to get 1080 @ 60fps ) "Stretched 720p @ 60fps just to keep the 60fps for the output"
HDCP Handshake ( When Enabling HDCP Protection on our PS4 the picture still worked )
More than 1 can be used at the same time ( Must be on different USB Controllers )
Any HDMI output device can be connected to it ( Must support P output and not I output )
Supported by many applications OBS, AMCam, VLC, and many many more.
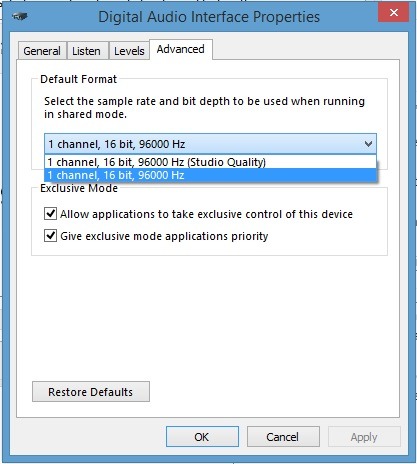
Audio output is Mono L&R audio are the same.
As the device was intended as a camlink device ( audio being mono is to be expected at this price range ) older mics on cameras would only be mono anyway
Video Format this device captures is only MJPEG, there are no other format options that we can find.
Even when going to the device there is only:
1 channel, 16bit, 96000 Hz ( studio Quality )
1 channel, 16bit, 96000 Hz
Not so much a negative but it has come up, Getting the audio to work with OBS when you have no audio in recordings, just go to your speaker bottom right of your screen right click it and select recording devices, now in the new window options select Digital Audio Interface right click it select properties, select the listen TAB, Now tick the box Listen to this device, Click apply, click OK you should now have audio.

This post contains affiliate links and we may earn a commission ( No Cost To You ) when you click and make a purchase using the affiliate links, This will help with costs and maybe buy a beer some day 🙂 Disclaimer.
This is the device used and setup using this review.
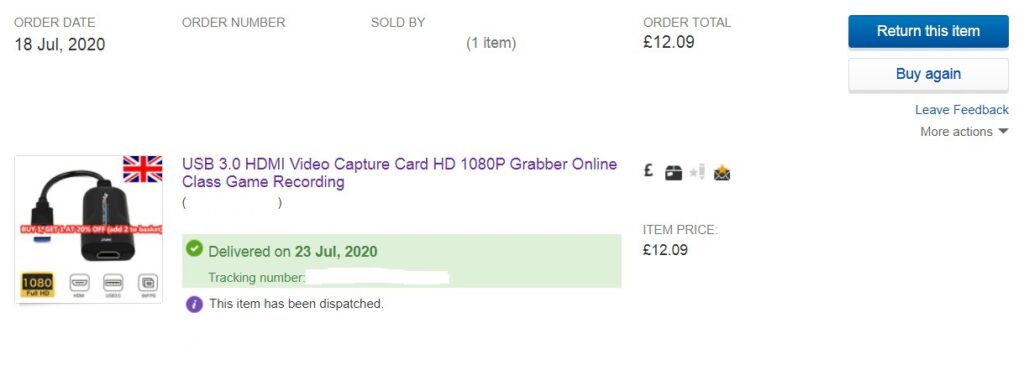
The above device shows in the listing as a USB 3.0 device ( That is wrong it is a USB 2.0 with a blue colored USB Male port )
Have you ever gone to twitch or youtube and watched a video or Live stream and wondered how do they do this ?, then walked away from your computer or laptop and been doing your normal thing through your day, but in the back of your mind all you can think about is how do they do that.
Here in this review we are going to take a look at a new device on the market that not only allows you to capture your gameplay, but this device also allows you to Live Stream from almost any device with a hdmi output.
What is this device:
Basically this device is a cheap alternative for a Cam Link.
What is a Cam Link:
A Cam Link is a way of connecting your digital camera to your PC or Laptop and allowing programs to use it in a way similar to a usb webcam, But for this to work your digital MUST have a hdmi output or mini hdmi output to connect to this device and this device does NOT support the I input, I input is interlaced ie – 1080i it only supports P inputs 1080p, 720p and so on.
As we all know camlinks are not cheap, let’s say for example the we have a digital camera ( DSLR’s and many others ) yet your camera does not have a webcam feature either in it’s menu or functions but it does have a hdmi output so you can view it on your HD TV, Well this little device will allow you to connect your hdmi output to it and plug it into your Laptop or PC and use the live image from your cameras hdmi output as a webcam so you can use skype and many other applications to face time with others.
This device is SMALL yet has many many features like changing resolution to changing frame rates to color output, hue, saturation, brightness, you get the idea many simple features with this device can be found in a webcam
So we connected this device up to a android box that supports 4K display so we could test exactly how high of a display the device input will take, we looked and the android tv box on boot was set at 720p and it looked great, we wanted to see how high a resolution the video capture device would go and guess what! it took 4K @ 60Hz ( 60fps ), A 4K 60Hz Sample Capture below captured with OBS, now understand the max output we have in OBS on the laptop is 1920×1080 @ 60fps, The max that the video host will do is 720p @ 60fps but the video uploaded was 1080 @ 60fps so the sample video is limited to 720 HD.
4K 60Hz Input Sample Video: This video was captured on to the laptop hdd
The above Video played using youtube is for Testing Purposes and not advertisement
As you have seen in the video above this device for the price range is great so far and has surpassed our expectations by a leap, we have done test after test even with gaming consoles and here is another video sample below showing the nintendo switch playing mario.
Nintendo Switch Sample Capture: This video was a live stream to twitch
The above Video captured is for Testing Purposes and not advertisement
Above is a great sample from a nintendo switch, as we have said before we have done a lot of testing with this device including editing color correction, brightness and more while capturing and this sample video is also below.
Nintendo Switch Color Correction Sample: This video was a live stream to twitch
The above Video captured is for Testing Purposes and not advertisement
So as we get further into this review about the HDMI to USB Video Capture we can see the picture quality is exceptional for the price range it comes, the audio is only mono and this is a downfall for this capture card but at the price it is something we can live with as a startup budget live streaming device it is on the money and opens up a whole new world for people on a budget wanting to start live streaming to youtube, twitch or even facebook live.
The audio is output as 1 channel and the options are in the below pic.
Device audio properties:
The device is PLUG ‘n’ PLAY on windows 8.1 and 10 we have only tested on a windows 10 desktop and a windows 8.1 laptop so far and as soon as the device is plugged in it is recognised as a USB Video, the drivers install automatically.
The usb video capture is a great little device we have spent many hours playing with the settings, tweaking things in the device so below are a few changes we made from default to get the best picture from the device.
If you don’t have OBS installed download it from the Official Site source ONLY:
Adding the device to OBS after windows drivers have installed:
- Open OBS ( After installing it if you don’t already have it installed )
- in Sources ( Bottom Left Middle ) Hit the + and select Video Capture Device
- give it a name or leave as default ( Video Capture Device ) click OK
- In the next window in the device Select USB Video
- Below that click Configure video
- in the next popup Properties window the default brightness is -11 click and slide the slider to the right until it says 0 then click OK.
- Now we should be back in the OBS option window.
- In the Resolution/fps type change it from default to custom
- Now in Resolution below that change to your choice 1920×1080 or 1280×720 there are multiple options there as well but for this review we will chose 720 or Full HD
- Now in FPS chose your frame rate you want if you chose 1280×720 you will have up to 60fps choice but if you chose 1920×1080 you will only have a max of 30fps
- Now in Color Space Select 709
- Now in Color Range Select Partial
- Now Select OK and the device should be added to your preview window and in sources
Now you have added the device to the sources, there are a few other settings we need to change to get the best from our video capture device
- In your OBS Sources you should have 1 source Video Capture Device click it to hightlight it
- Now Right Click on it and Select Filters
- At the Bottom Left Select the + and select Sharpen leave it at the default name Sharpen click OK By default it sharpens to 8 we changed it to 6 choice is yours.
- Now again Click + and select Color Correction again leave the name at default and click OK
- Now we only changed 2 options with the sliders to -10
- Change only Contrast and Saturation to -10
For our tests these turned out the best options and gave us the best picture, there are a few other settings we changed inside OBS settings to get the best output from OBS and below we will go through this also with you.
- To the bottom right in the OBS program there are a few options Start Streaming, Start Recording, Studio, Settings, Exit, Click on Settings
- In the new window Click Output in the left TAB
- Now in the Video Bitrate at default it’s 3500 This is the streaming default for twitch you can change it to whatever you like, local recordings are minimum best from 14000 to 40000 the higher the bitrate the larger the video file will be.
- below that the Encoder options are Software (x264) we had another option also as our laptop supported it Hardware (QSV) when we selected software (x264) our laptop was working overtime for 1080 at 60fps it could hit max 100% CPU and start dropping frames, but When we selected Hardware (QSV) we were lucky to hit 40% CPU load for 1920×1080 @60fps and for 1280×720 @60fps from 15% – 20% CPU Load.
- So if you have the option for hardware encoding chose that.
- Now below that in the recording options change Recording Quality to Same as Stream
- Recording Format change to mp4
- Now in the LEFT Options again Select Video This is your output to file select 1920×1080 in the top or 1280×720 up to you, If your CPU load is 100% when making a sample recording and you chose 1920×1080 change the size to 1280×720 ( if 1280×720 is a little too much, try turning the Common FPS Values down to 30 )
- In the downscale Filter we selected Lanczos ( Sharpened Scaling, 36 Samples )
- In Common FPS Values We Selected 60
- Now the last options we selected, In the LEFT TAB Select Advanced
- In the video Options change Color Space to 709 and Color Range to Partial
- That should now be completed Click Apply bottom right then click OK
Now we should be set to make a sample recording and see what type of load it puts on your system if the load is to much for your system and maxes out your CPU to 100% think about changing the video options in OBS Settings as stated above when selecting the option for output size.
Audio & Video Issues & Solutions:
Audio Issues
- Not so much a negative but it has come up, Getting the audio to work with OBS when you have no audio in recordings,
- Just go to your speaker bottom right of your screen, right click it and select recording devices.
- Now in the new window options select Digital Audio Interface right click it select properties.
- Select the listen TAB, Now tick the box Listen to this device.
- Click apply, click OK.
- You should now have audio.
Video Issues
- Does your video look stretched and out of place do the below
- in OBS sources options Right Click on your Video Capture Device in Sources
- Goto Transform > Fit To Screen
Your video should now be back to full screen in your preview window.
Capture smooth Full HD @ 60fps
- in OBS sources options Right Click on your Video Capture Device in Sources select Properties
- In the new window options under custom, Change Resolution to 1280×720 and FPS to 60 and click OK
- To the bottom right in the OBS program there are a few options Start Streaming, Start Recording, Studio, Settings, Exit, Click on Settings
- In the new window Click Video in the left TAB
- Now in the right options change base and output to 1920×1080 and make sure you have common fps values to 60
If the CPU load is too much for your system these are the output settings to change to lighten the CPU Load. Try first to change the Common fps values to 30, by doing this you are halving the frames per second ( fps ) in the output but taking 30 frames from a second can help your pc or laptop by a lot, as your video won’t look as smooth, when playing 30fps rather than 60fps.
If that doesn’t fix the CPU Load your system may have trouble capturing FULL HD try capturing HD Ready quality by changing the Base and Output to 1280×720 and common fps values to 60
After many hours of playing with this device in the OBS software we have really had fun and been testing different bitrates and different options to get the best results from this device and found the above selections to be the best on our laptop and desktop, please bare in mind our desktop test was with a ryzen CPU and a cheap nvidia 1050 graphics card and the FULL HD @ 60fps on that system didn’t even touch the CPU load at 5%.
The Device We Used In This Review
All in all this test was on a £12.09 device + Free delivery which took 1 week for us to receive it, We are more than happy and will be using it in the future have no mistake, we also have the elgato hd60 and altho they are miles apart quality wise and price wise this little device was the simplest and a lot more fun setting up getting to know the device and it’s little qwerks have been fun and educational.
If you think of anything we have forgotten to mention or missed please leave a comment below.
")
")

 – Trailer")
")


 – Trailer")
 – Trailer")
 – Trailer")
Leave a Response